
First Posted 3/6/2021
Welcome to the fifth and final installation of the Linux for Hams series of posts! Today we will be installing one of the most popular Software Defined Radio applications, GQRX, on our Linux machines. I’m going to be using Raspberry Pi OS Linux (Buster) on my RPi 4 to hear NOAA’s Chicago Weather Radio station with the Nooelec NESDR bundle I bought at the start of the pandemic. Everything in this post does not require a ham license, and should work with most RTL-SDR devices. If you’re using AntiX Linux 19 on an old machine instead of a Raspberry Pi, the highlighted text within the article will show you a few minor differences. To be honest, this post is barely scratching the surface of what you can do with the RTL-SDR dongles, and I’d highly recommend checking out other blogs & YouTube channels for more fun SDR ideas. There’s even a distribution of Linux specifically for SDR on Raspberry Pi these days!
May 2024 edit: Most of the stuff here is still valid, but with the new Raspberry Pi 5 and Debian Bookworm-based Linux distros, things might be slightly different. These writeups will not be getting revised, check out YouTube & other blogs if you need something more current!
Make sure you have working internet on your Linux machine by firing up a web browser and surfing some websites before proceeding; if you’re struggling to get internet definitely check out the techsupport subreddit for troubleshooting ideas. Apologies in advance if this starts off a bit slow, I’ll be going into much more step-by-step detail than usual so those with no Linux experience can follow along. Please note that GQRX is included in HamPi and PiSDR, which may be better solutions than my guide for some Raspberry Pi users.
Unfortunately getting a working audio output can sometimes be an uphill battle in Linux. On the Raspberry Pi 4, you have quite a few options for audio outputs between the Bluetooth radio, USB headsets, and sound card. On an older computer with AntiX Linux, you may have access to a laptop’s built-in speaker, but you might end up wanting a USB or Bluetooth headset instead due to driver issues. For today’s post, I will be using a Jabra USB headset, but most flavors of audio input & output should be fine. Before installing GQRX, make sure you are using the correct audio device per the following steps:
Raspberry Pi OS Users:
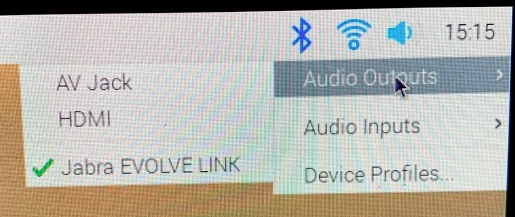
Head over to the top right of your screen, right click on the audio icon, make sure the device you’d like to use is selected under Audio Outputs:
AntiX Users:
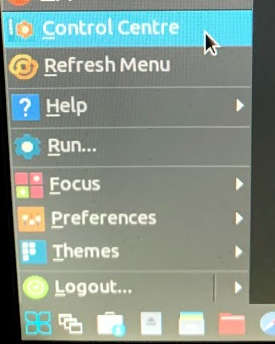
Click on the Favorite Applications menu in the bottom left corner, then click Control Centre:
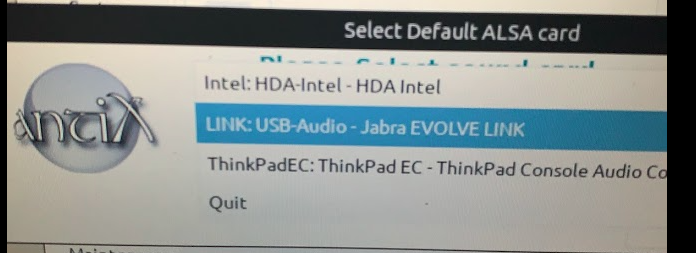
Click on the Hardware tab on the left side, then click “Sound Card Chooser”. Find your headset or sound card on the drop-down menu, save everything, and you should be all set:
I must warn you that if you’re on an older machine, there’s a decent chance your sound card might not be compatible with AntiX without a lot of troubleshooting. I’ve spent a large amount of time trying to get sound working on my Linux laptops over the years, it can get really frustrating! If you find yourself in that position, I’d recommend getting a newer USB sound card or USB headset, it might save you from quite a driver headache.
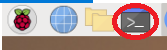
Now that we got the audio output ironed out, open up a terminal window on your Linux machine by clicking the Terminal button in the upper left of the screen:
(AntiX users: Click on Favorite Applications icon in bottom left corner, Terminal should be at the very top of the menu)
Start off by typing the command “sudo -s” without the quotes, then press enter. Although this isn’t the best security practice, it will allow us to ensure we have proper rights to install GQRX. You may be prompted for your password depending on your security settings. This will result in seeing “root@(your computer’s name)” in the terminal window:
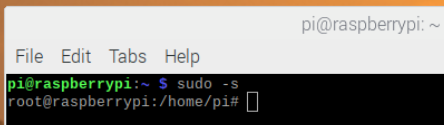
Type in “apt-get install gqrx-sdr” without the quotes into the terminal window, press enter. This will install install a very large amount of software dependencies to ensure your SDR functions. You’ll be asked if you want to continue installation, type y and press enter once more.
Once the installation wraps up, you should see an icon for GQRX under your Pi’s Applications Menu -> Internet -> GQRX!

(AntiX Users: Click on Favorite Applications icon in lower left corner, Applications menu, Internet, GQRX)
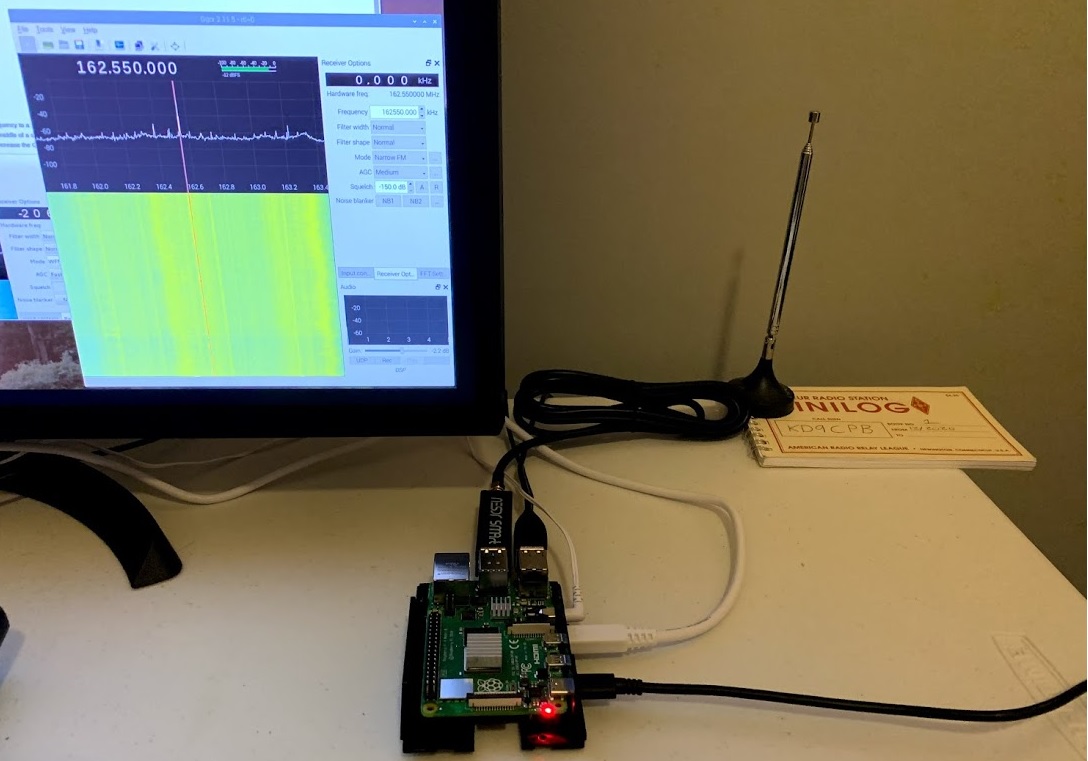
Plug in your USB SDR, and launch GQRX. You’ll be greeted with an I/O menu, pick the Realtek 2832 device, then click ok. Note that some of you may have multiple options, some Generic, some Realtek. For my Nooelec dongle, I had to chose the Realtek one. If you have problems, try different options in the I/O settings. Next, set the frequency & mode you wish to test with. For me, I’m using 162.550khz and Narrow FM mode to get NOAA’s KWO-39 station, but you may wish to listen on a local ham radio repeater frequency or even broadcast FM radio to ensure everything is working. Click the Play icon in the upper right to start the SDR, and if you’re tuned into a good station, you should see the waterfall come to life!
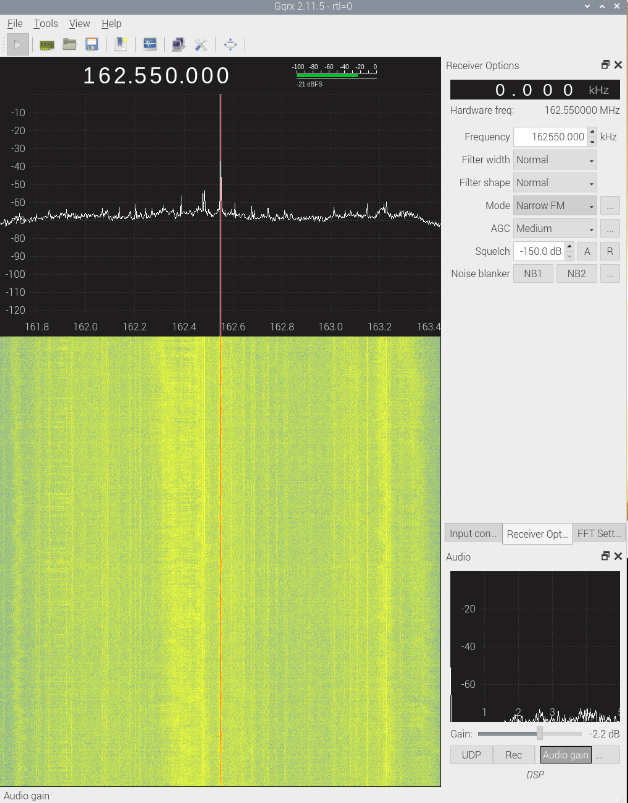
If you hear very weak or no audio, play with the Gain and Squelch settings, the gain in particular may need some tweaking. If you don’t get this far or still have audio problems, don’t worry, there’s many YouTube videos on this topic which might lead you towards resolving the technical difficulties.
I’ve had a lot of fun writing these over the past month, and I sure hope at least one person gives Linux and/or Raspberry Pi a chance in their ham shack after reading these. If you’re doing something really cool with SDRs and Raspberry Pi’s, please share it in the comments! Again, this post just barely scratches the surface of what is possible with these RTL-SDR dongles. Between hosting a Broadcastify station, tracking airplanes, receiving signals from the ISS and more; the sky is the limit with these SDR dongles and Raspberry Pis. Thanks for reading, and happy SDRing!
You’ve reached the end of the post! Click here to go back to the list of all Ham Radio posts.
You should also know I may earn commissions on qualifying Amazon purchases made via kd9cpb.com links to defray the cost of otherwise ad-free web hosting.
2 thoughts on “GQRX (Nooelec & RTL-SDR utility) on Raspberry Pi OS & AntiX Linux”
Comments are closed.