
First posted 10/1/2023
It’s been a very busy summer over here, after a good year and a half since moving away from the condo balcony antennas, I’m finally happy with my setup at the new QTH. Unlike my previous 10m HF antenna goals, this time I just wanted something on my rooftop that would:
- Look halfway decent around the unused cap on my chimney
- Get me back into the local 2m/1.25m/70cm repeaters with ease
- Have something I can use for 10m/20m during the daytime hours or when band conditions are good
- Have something I can use for 40m when at night or when 10m/20m conditions are bad
While it’s anything but perfect, I’m confident I have it well secured to the chimney in a way that won’t damage anything or anyone during the worst of Chicagoland weather, and with luck it’ll keep me happy until my kiddo is old enough to get a license 🙂
Goal #1: Work within the constraints of chimney space
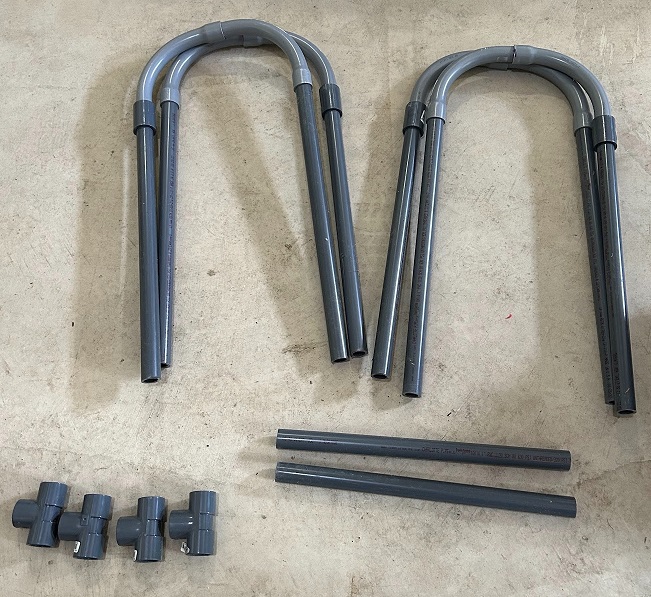
I have zero desire to do a chimney strap or drill into the masonry, so building something that gravity would keep attached to the unused 3rd chimney cap of my 3-stack chimney seemed like the best idea. After buying a bunch of PVC conduit, I came up with the following setup using 90-degree bendy segments and plain old schedule 80 PVC:
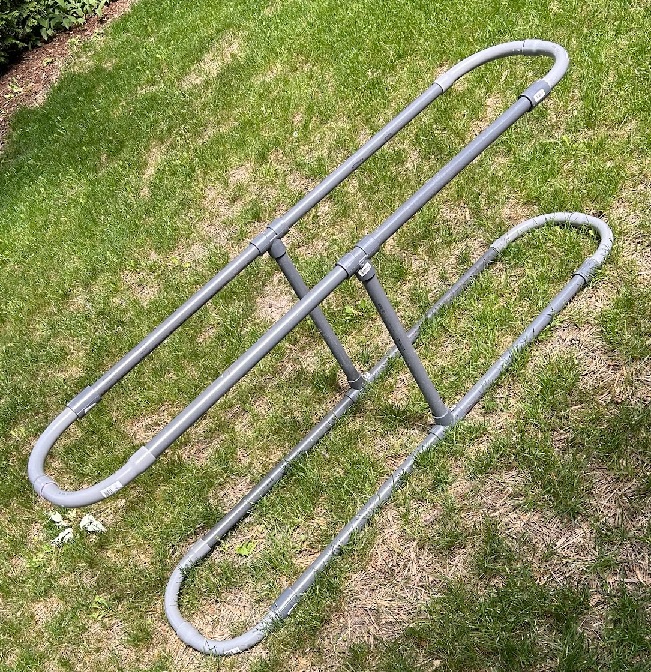
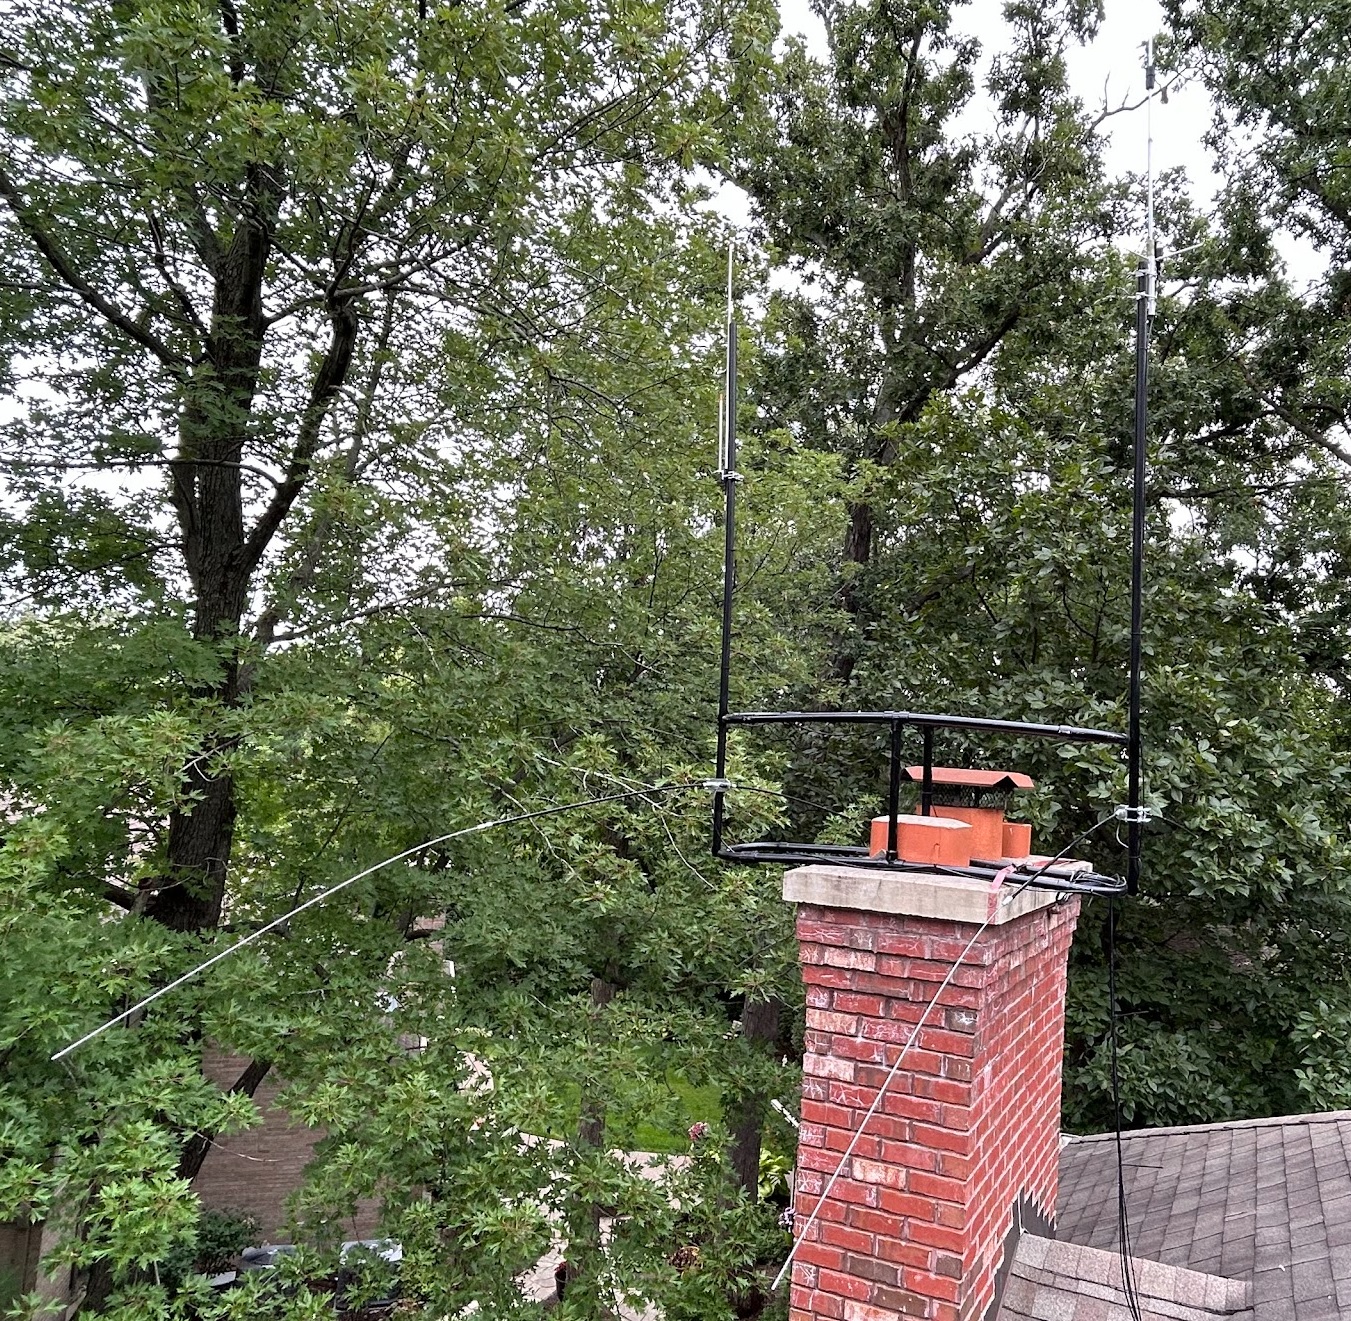
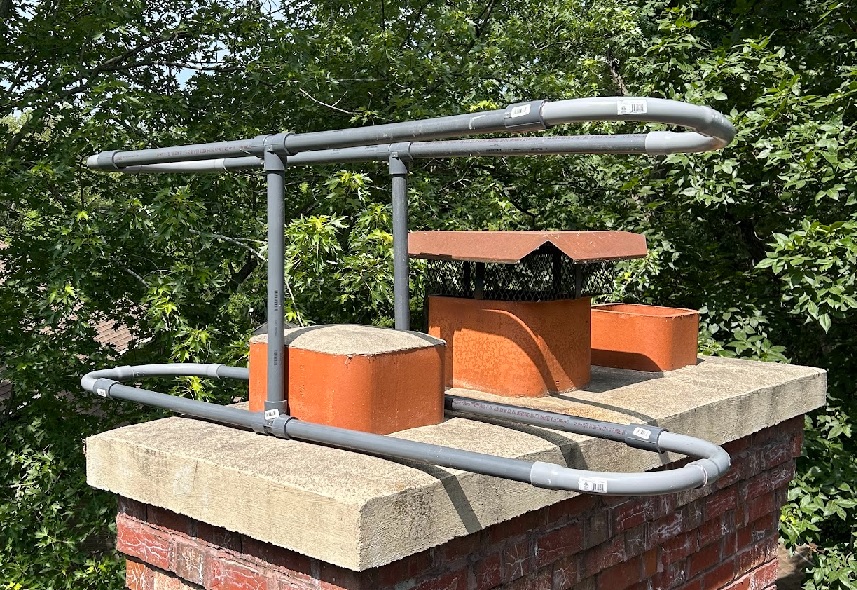
I was worried this would be too flimsy at first, but it fit around the chimney cap perfectly! After attaching two approximately 6ft PVC pipes to the ends for my 220mhz & VHF/UHF antennas, things began looking good, although I sadly didn’t get a picture of that before attaching antennas. To keep it sturdy & good-looking, I spray painted it all black & applied a clear coat of UV-resistant stuff. Gravity appears to be keeping the antenna system in place without issues, but just to be safe I purchased a cheap cargo strap that will keep everything in place during the worst storms.
Goal #2: Dual-band VHF/UHF + 220mhz Success
One of my biggest frustrations with my old condo was the inability to hit the W9ANL repeater from home, so getting VHF capabilities as optimal as possible was a must. I decided on keeping the Cushcraft AR-270 antenna from the old condo setup since I’m too cheap to buy something else, and I’ve been quite happy with its performance. Only problem is that doesn’t help me for 220mhz, and getting back into WM9W + Chicago FM Club’s 220mhz repeaters was a hard requirement. After much debate and soul-searching, I decided on getting an Arrow Antenna OSJ220 J-pole, and I’m now a huge fan! The SWR on that J-Pole is so low I thought my SWR meter wasn’t working for 220mhz at first, which makes me so happy considering I first got my license at the 220Mhz Guys & Gals nearly a decade ago.
I ended up putting the 220mhz antenna on the side of my PVC structure closest to a nearby tree since it’s shorter than the Cushcraft AR-270. Both antennas and the structure itself doesn’t stick out too much from street view, so I’m pretty pleased with the final result.
Goal #3: 10m/20m HF capabilities
Since I have the #1 Google search result for the term “10m FT8“, I felt like I absolutely needed a good 10m setup going forward 🙂 Now that being said, I’m also super cheap and didn’t want to buy anything new, so I kept the 2x MFJ-1610T hamstick with MFJ-347 dipole adapter I had at the condo. This time around, I mounted it horizontally, and I’ve been crazy happy with the results. This weekend I’ve gotten good 10m contacts with Europe and South America on only 10 watts with the Xiegu G90. It still blows my mind that you can do that with just a technician license, and I might have to get into 10m SSB knowing the dipole performs well.
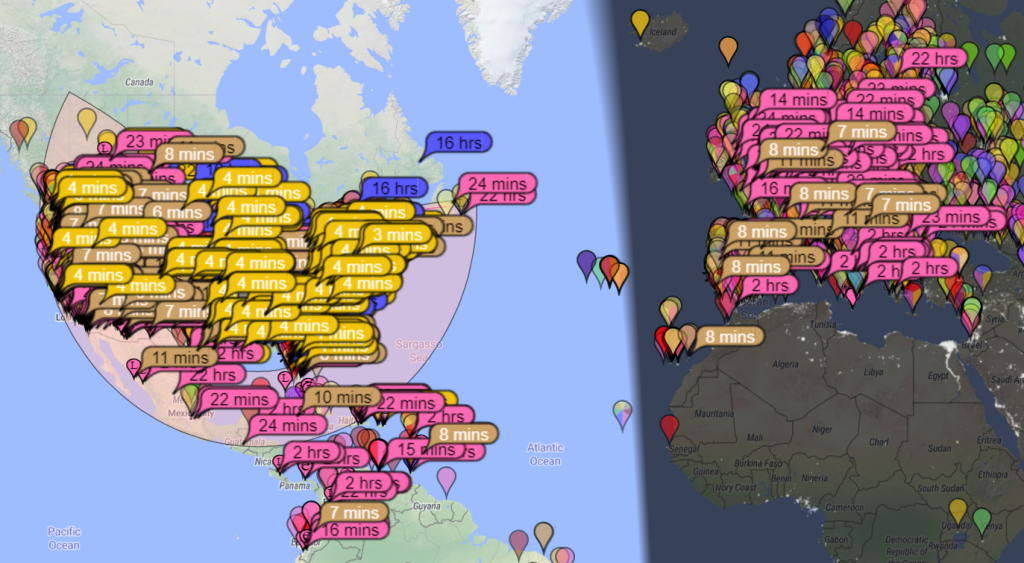
But wait, there’s more! I’ve been tuning this 10m hamstick dipole to 15, 17 and 20 meters on occasion, and although the SWR is a bit higher, the Xiegu tuner seems to be working well. While tuning the 10m antenna is very far from an optimal solution, here’s what I was getting on PSKreporter today, with 10m in Pink, 15m in Brown and 20m in Yellow:
Goal #4: 40m capabilities
When I first moved into the QTH, one of the first things I did was install my 10m hamstick dipole in the attic above my garage. I did this not so much to get FT8 QSOs, but more to just observe what an HF antenna in sub-optimal conditions could pick up with my SDRPlay Duo. Unsurprisingly, at night the 40m reception was quite impressive, so I figured it would be worth the time/money/effort to get something for 40m on my rooftop too.
After thinking about it quite a bit, I decided to simply keep doing what I’ve been doing with the 10m hamstick dipole for 40m, putting a near identical setup on the other side of my PVC mounting hardware. While I’m very well aware this isn’t the best situation for the bigger 40m waves, it looks pretty decent on my roof since the dipole is nice & symmetrical with my 10m setup. The SWR is a little bit higher than my 10m hamstick dipole, but I’m getting all around the continental USA at night without any problems.
Well that’s nice, but what about the hamshack itself?
I’m not super happy with how my hamshack looks inside right now. If anything, I’m a little embarrassed about how the four feedlines are coming in. But there’s so many other projects around the house & at work that I don’t think I’ll have an image worth sharing for quite some time. When that day comes, I’ll probably blab about it here, so stay tuned!
You’ve reached the end of the post! Click here to go back to the list of all Ham Radio posts.
You should also know I may earn commissions on qualifying Amazon purchases made via kd9cpb.com links to defray the cost of otherwise ad-free web hosting.
You’re not cheap, you’re just inexpensive!
Good on you, nice article.
Thanks so much! Gotta save up for a real 100W HF base station someday 🙂