
As always, opinions in this post are solely those of my own, and not necessarily those of any organization I am currently affiliated with or have been in the past.
First posted 12/19/2020
You know what I want for Christmas? All my Cisco ISE 2 things to get magically upgraded into ISE 3 patch 1! You know what I don’t want for Christmas? Dealing with angry people because ISE 3 patch 1 broke stuff! As much as I love learning new things in the network security field, I prefer not to learn tough ISE lessons in production whenever possible, which is why I spend a lot of time with my ISE 3 eve-ng homelab these days. In all honesty, the ISE 3 patching process is near identical to how it is in ISE 2, so if you came here just to confirm that, feel free to stop reading further. However, for those newer to ISE, I figured it’d be a good homelab to show how easy it is to throw a FileZilla server together as a repository for ISE backups, as you should really be doing a backup as a prerequisite to patching.
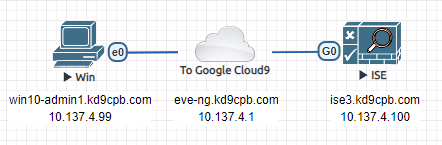
Google Cloud’s Iowa us-central1 is the perfect winter wonderland this time of year to test out ISE 3 patch 1, so let’s get ISE cold! Today’s topology is going to be dirt simple: just a Windows Admin Desktop & ISE 3 Server directly plugged into my eve-ng Cloud9 interface on the GCP eve-ng instance:
I’ll be using the same ISE installation that was configured during the initial homelab setup post, but don’t worry if you’re starting from scratch, ISE 3 is pretty easy to setup thanks to the official eve-ng instructions. You’ll also need to download ISE 3 Patch 1 from Cisco’s website, or know someone that can. Once you have the patch downloaded, let’s get started by backing up our config before attempting to patch. Don’t forget, if your doing this in a GCP cloud instance or “air-gapping” your eve-ng topology, you can SCP the ISE patch up to /opt/unetlab/html/files/ise.tar.gz on the eve-ng instance, then use the http://(eve-ng server ip)/files/ise.tar.gz trick on your Windows VM to get the patch into ISE.
Step 1: Backup to Filezilla as a repository via FTP
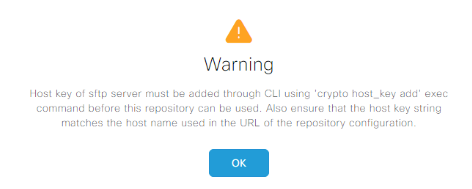
Start off by getting the latest & greatest FileZilla server on your Windows box. Sure, you could easily use a Linux server with openSSH for SFTP or vsFTPd, but if you’re not used to setting those up properly, it can be an uphill battle getting their config files perfect. Even if you get SFTP working perfectly, there’s some wacky host key stuff that it’ll bug you about, and I’m too lazy to deal with that in the homelab:
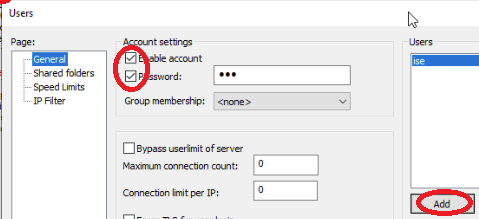
Once you get Filezilla installed on the Windows admin VM, open the FileZilla admin console with the default settings, click on the user icon (single person looking icon), then create a user for ise with a password:
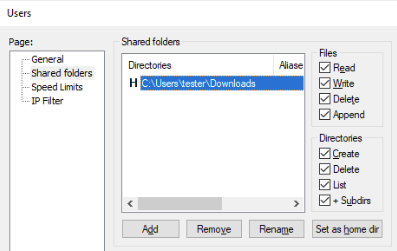
Click on the Shared Folders page, and give the ISE user lots of permissions along with a good home directory. I’m just using the Windows-default downloads directory, again because I’m lazy:
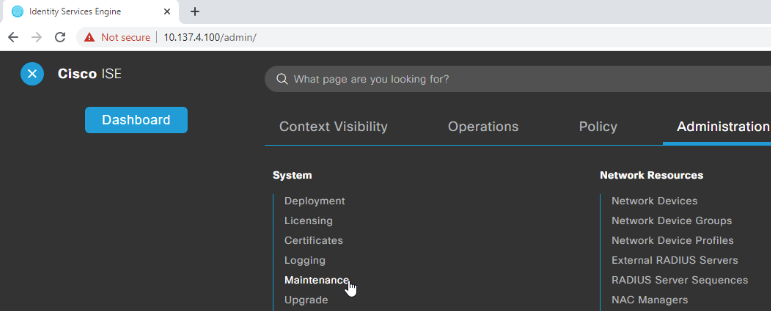
Save your new FileZilla user settings, then Login to ISE3, click on the 3 bars in the upper left corner, and select Maintenance under the Administration menu:
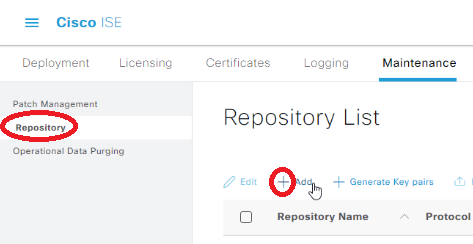
Click on the repository link on the left side, then click add:
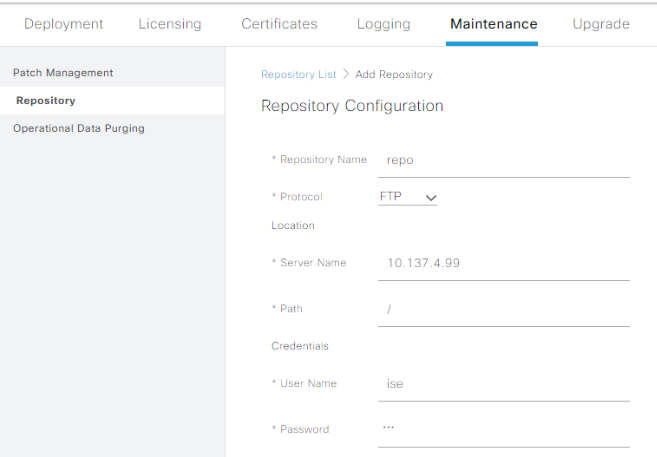
Enter the IP of the Windows client, use / as the path, put in the proper creds, and submit:
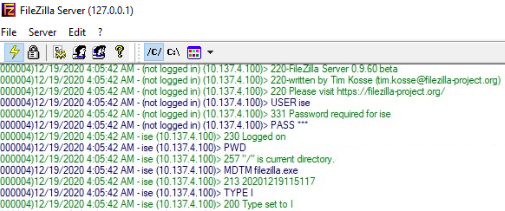
Once your repository is created, check the box next to the left of it, and click Validate. If ISE has any error messages, make sure to disable Windows Firewall and reboot your eve-ng instance before losing your mind over a simple mistake. If all went well, you should see lots of log traffic in the FileZilla server!
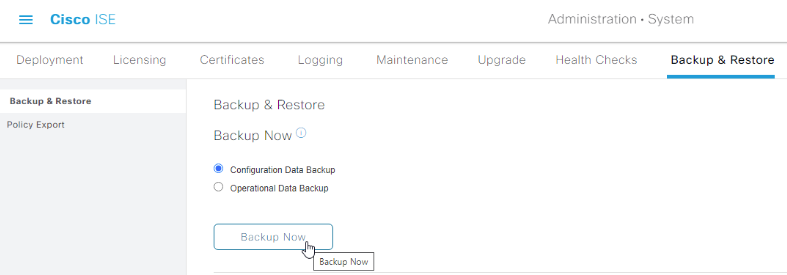
Now that our repository is squared away, head over to the backup & restore tab, and backup your configuration data. I’m not going to backup the operational data as I don’t really care about it here in the homelab, but it’s the same process for getting that config data backup completed if you’d like to do that:
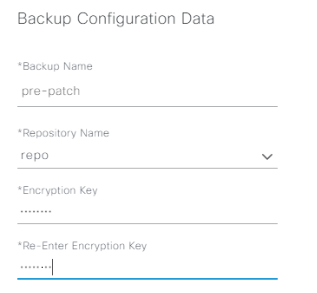
ISE will ask you to provide a backup name and an encryption key. It always takes me at least two tries to get the exact combo it wants (>8 chars, <15 chars, etc.), but once you get this figured out, the backup will begin:
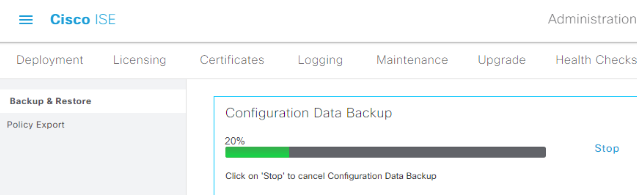
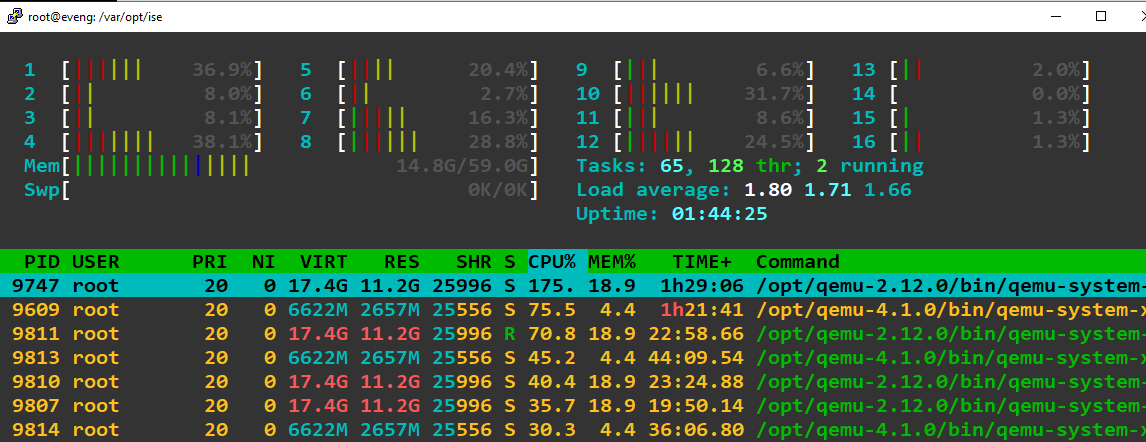
You’ll notice the backup is going to get stuck at 20% for awhile, and take what feels like forever. This is because there’s a ton of things happening in the background on ISE to generate the backup files, be patient! I’ve installed htop (apt install htop on the eve-ng console) to better spy on how busy my eve-ng box is when ISE is doing its thing, and we can see there’s a ton of activity while the backup is running.
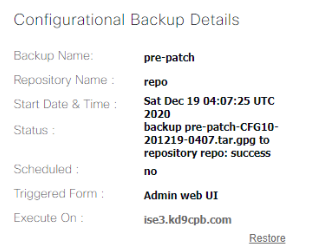
After ISE does its thing, you should see a successful backup on the page, along with more FileZilla activity!
Now that we have a good backup, we’re good to proceed on patching ISE. Also worth noting: if you’re patching a production ISE server or have real SSL certificates on your homelab’s ISE instance, make sure to export those in the Administration -> System -> Certificates menu. It’ll make your life a lot easier should you need to rebuild ISE if things go poorly.
Step 2: Install ISE 3.0 patch 1
Meet me at the Administration -> System -> Maintenance -> Patch Management window inside of ISE:
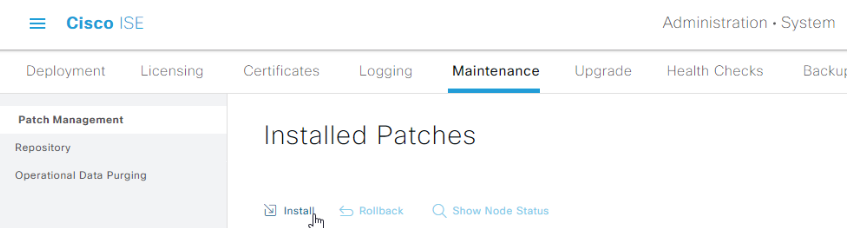
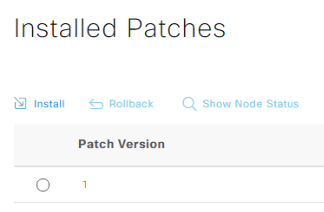
Click on Install, select your patch file, click install, then be extra patient while it’s uploaded from your web browser. You’ll see a super brief message saying the patch has been received, and that ISE will reboot. Be extra, extra, extra patient while ISE patches. Seriously this will take so long that you’ll think ISE crashed, go walk a few miles or something! Log back into ISE, and under that very same Administration -> System -> Maintenance -> Patch Management menu, you should be greeted with patch 1 showing as installed:
Conclusions
So you may be thinking “Wow Tom, way to make a detailed blog post about a simple 1-click, 1-file upload patching process. Was this really necessary to post about?” Well, to be honest, I was thinking that a little bit myself too! The reason I’m posting this isn’t so much because the ISE patching process is difficult, it’s more to validate that patching ISE 3 isn’t much different than ISE 2, and confirming stuff like this in a homelab beats learning things the hard way on production ISE. I also wanted to prove the point that even though backing up ISE is a lot more steps than just patching the darn thing, you really should back it up first, otherwise patching may become much more painful than you’d like. Even if you have to shadow-IT-style deploy FileZilla just to get the backup going, it’s best to have that spare tire available in case you break the ISE.
Originally this homelab was going to use the eve-ng server itself as an SFTP repository, but I got so frustrated with various issues that I ended up going the FileZilla route. I made the executive decision that my weekend time would be better spent getting into the holiday spirit and baking festive cookies instead of dealing with SFTP in my ISE homelab. I feel like it’s usually worth it to deep-dive into why stuff like that isn’t working, today’s example would be a great way to learn more about SFTP, and that knowledge may come in handy someday. Sometimes, especially if you’re short-handed or in the middle of firefighting, there’s no shame in propping up a temporary FTP server to backup your data, as long as you quickly remove the shady temporary things you did before someone who shouldn’t have your data finds it! Don’t be like the sysadmins responsible for the Solarwinds unsecure file server stuff. If you accumulate technical debt like I did today setting up an insecure FTP server, pay that debt off quickly. Back your stuff up, and enjoy a wonderful holiday season 🙂