
As always, opinions in this post are solely those of my own, and not necessarily those of any organization I am currently affiliated with or have been in the past.
First posted 11/29/2020
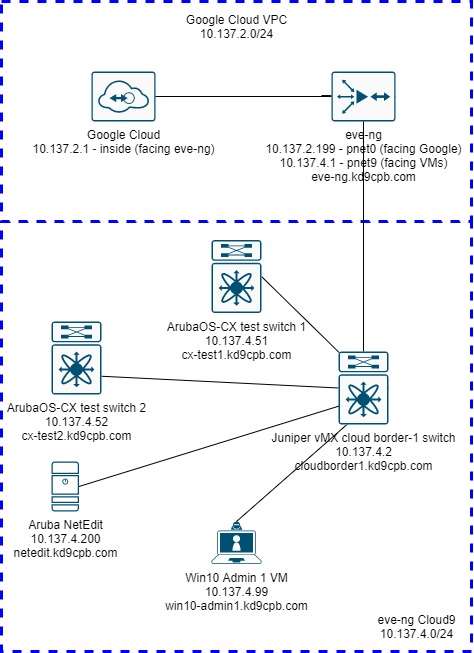
In the Initial Setup of my Google Cloud Platform (GCP) eve-ng instance, I blabbed on a lot about the tunnel between my condo’s homelab and GCP, saying I’d do cool stuff with ArubaOS-CX (AOS-CX) soon. That was over a month ago, and today is finally the day for long overdue cool AOS-CX stuff in my homelab! Let’s jump into Aruba’s fancy new NetEdit OVA and get it talking to a few AOS-CX virtual switches in the eve-ng instance, no ridiculous cloud tunneling stuff this time around. I really like the concept behind NetEdit: a feature-rich fancy UI to do new-school EVPN VXLAN things, CLI change history for when you do old-school network things, and a change validation toolset to avoid bad things from entering production. Unfortunately Aruba does not make AOS-CX or NetEdit available for public download. You’ll need to buy some Aruba stuff to get access into the downloads section of Aruba Support Portal, or become friends with someone that does to do this lab at home. Once you get those AOS-CX and NetEdit .ova images, meet me inside of eve-ng:
Starting Configs
Juniper Switch & Windows VM:
These are unchanged from the initial setup of my homelab. It’s a plain Windows 10 workstation for getting into NetEdit’s webGUI, and a plain Juniper vMX switch using vlan 1 for forwarding packets between all the nodes. You can use just about any workstation & switch combination for this. I’d recommend using the HTML5 console when accessing the admin workstation for a slicker experience, but you can keep using VNC on the legacy console if you’d like, they both produce the same end result.
AOS-CX Test Switches
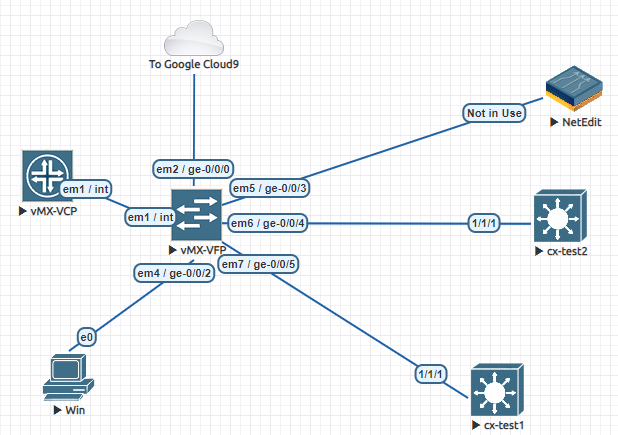
The official eve-ng documentation on adding AOS-CX virtual switches is great, I’m not going to go through the steps of getting these setup as their directions are better than anything I’d write. For this lab, I decided to go with two switches named cx-test1 and cx-test2, their configs will start out near identical. Once the switches have booted up, I’m applying the following default config, which you’ll also find on the github folder for this lab:
hostname cx-test1 (or cx-test2)
ssh server vrf default
https-server vrf default
!
int 1/1/1-1/1/9
no shut
no routing
!
int vlan 1
ip addr 10.137.4.51/24 (or 10.137.4.52 for cx-test2)
!
ip route 0.0.0.0/0 10.137.4.1
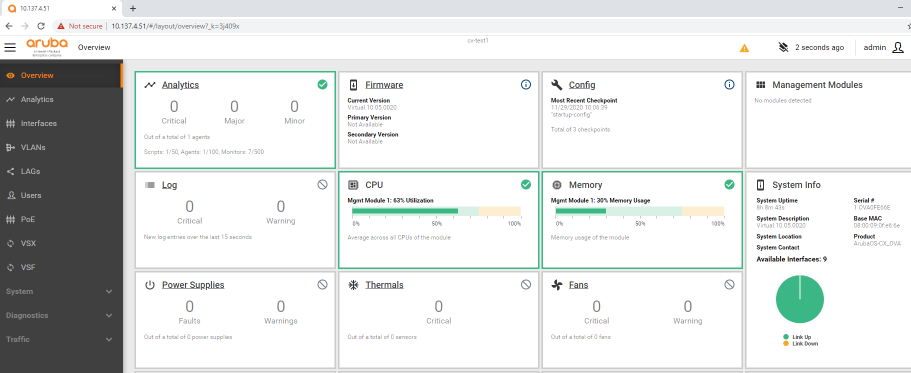
ip dns domain-name kd9cpb.comI’d recommend firing up the web browser of your choice on the admin workstation (I’m using Chrome), and make sure HTTPS management can be accessed on the AOS-CX switches, using the admin credentials you set on first boot. Check your topology, switch configs and IP address settings everywhere if you don’t get this far. Testing HTTPS management connectivity now will make tshooting any issues when adding the switches into NetEdit much easier:
Aruba NetEdit
The start of this section is mostly copy/pasted from the NetEdit portion of the initial homelab setup, if you have a more practical way of getting NetEdit working in eve-ng, please let me know in the comments!
Surprisingly I found no guidance on getting Aruba NetEdit to work within eve-ng; seems like most people are just running the OVA directly on vmware/KVM/GCP/AWS/Azure then following the official Aruba install guide. Sadly NetEdit requires a whopping 32gb RAM and 6 processor cores to run, but at least we can run it within eve-ng without spending more $$$ on another GCP instance with lots of RAM just for a single tool.
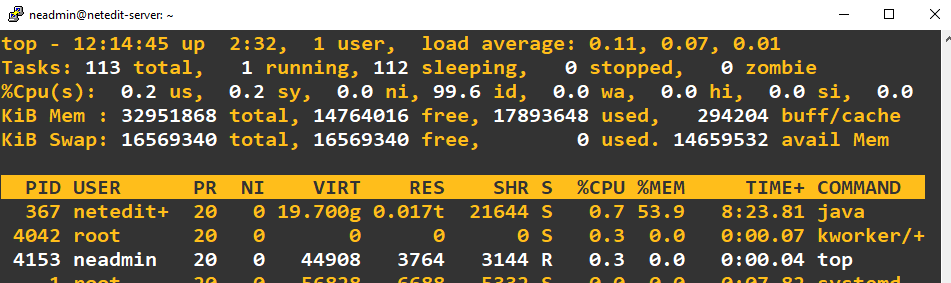
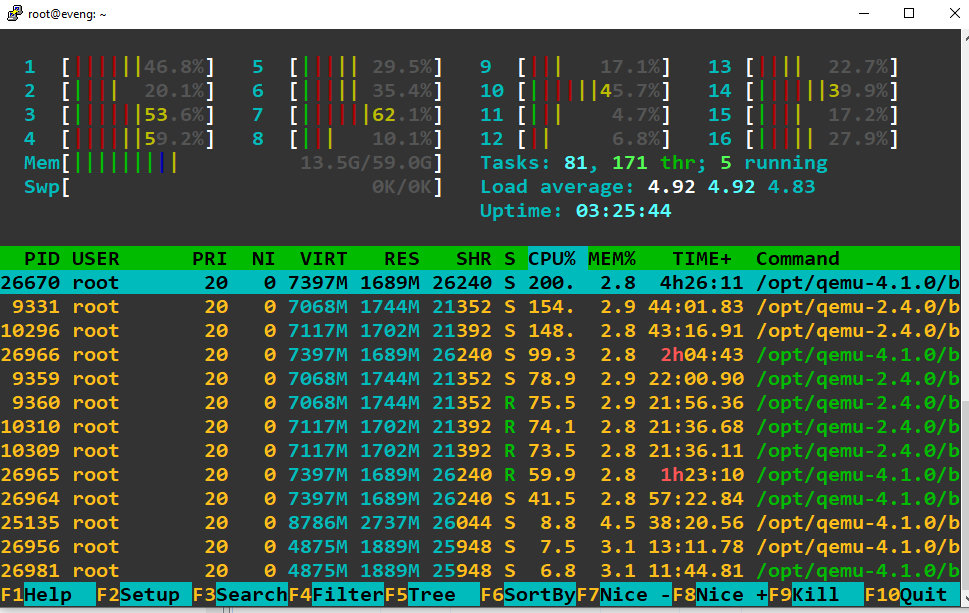
The trick to getting NetEdit running is to follow the Aruba AMC guide from eve-ng where you first convert the vmdk using that “/opt/qemu/bin/qemu-img convert” tool, set the node to use 6 cores, 32GB RAM, 1 NIC, then connect the “Not in use” NIC to your switch. NetEdit takes an incredibly long time to start, but once it gets going, the performance feels ok. I like the fancy looking default AMC icon in my eve-ng topology, but the “not in use” name for the interface is very cosmetically annoying. If you run top on the SSH console of NetEdit, you can see java getting allocated a massive chunk of memory:
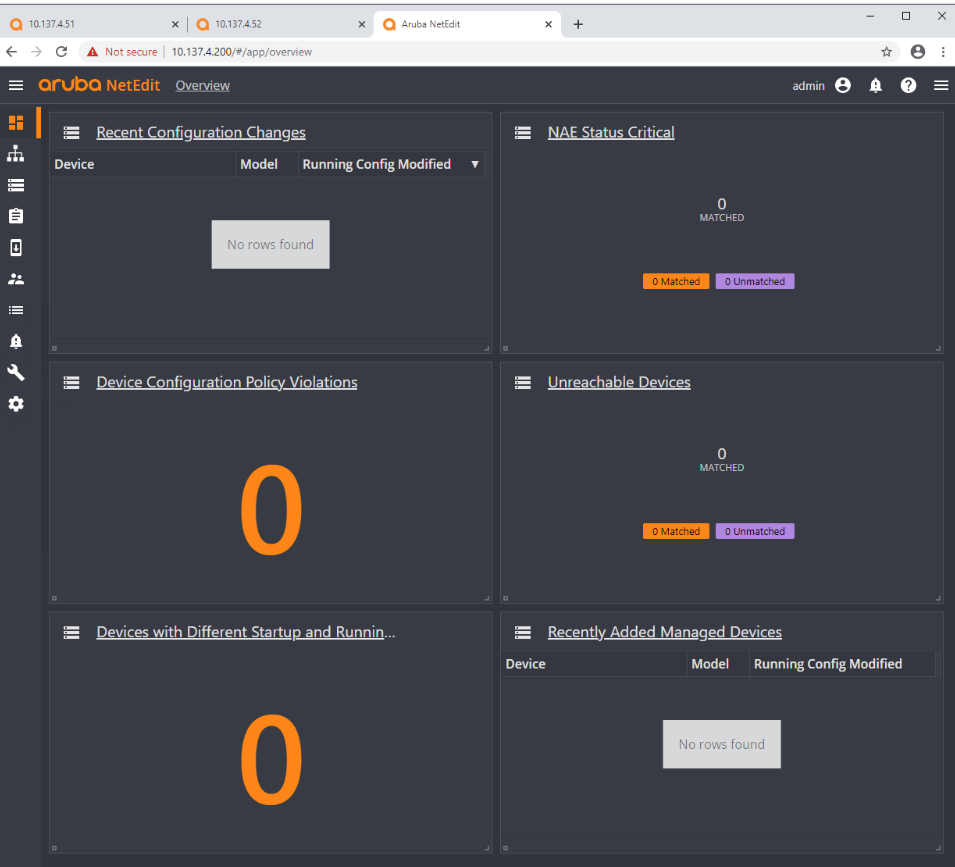
Once you get NetEdit to boot and set a password for the admin account, check that HTTPS access works from the admin workstation, just like we did on the AOS-CX switches earlier. I also like opening up htop on my eve-ng instance’s SSH console to see how much RAM we are actually using with all these nodes running, but that’s just me being nosy, it’s not required. You should be greeted with the Overview page of NetEdit at this point, and we can get started with our edits!
The Main Event: Adding switches to NetEdit, begin editing configs!
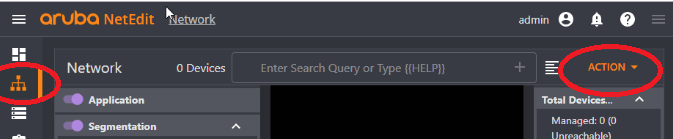
Click on the Network icon on the menu in left side of the screen, which will automatically open the “Discover Devices” dialog box. If you don’t see this, just click on the Action menu, then select Discover Devices:
Enter the subnet containing the AOS-CX switches, then click on Add Credentials:
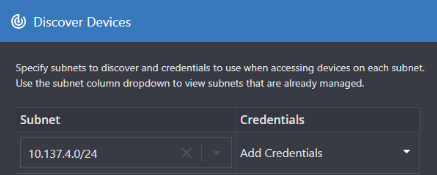
Make sure to add both REST and SSH credentials, name them something appropriate (I chose AOS-CX).This will be the same admin username/password you setup when the AOS-CX switches first booted up:

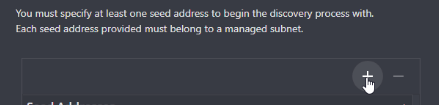
Now that we have a subnet and credentials defined, we can click on the + icon next to seed devices, and enter the IP of the cx-test1 switch:
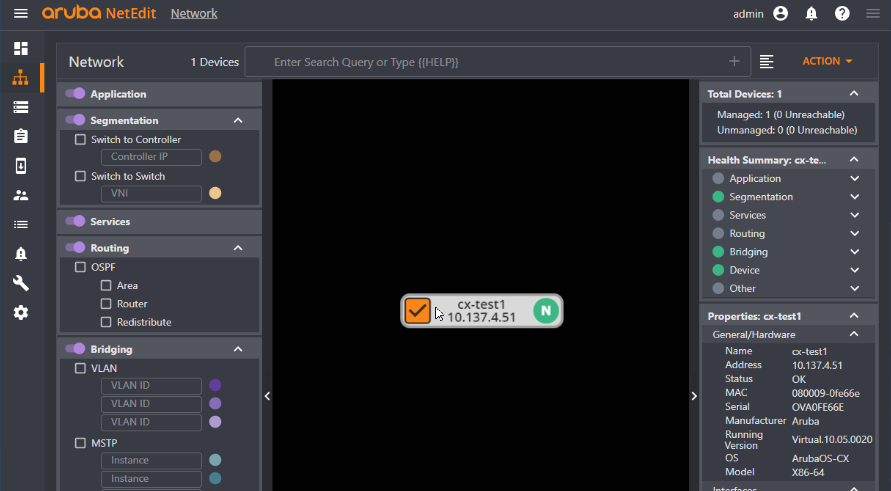
Check the box for that seed device, and click discover. If all went well, we’ll see cx-test1 appear as a managed device! Click on cx-test1 once you see the icon in the center panel, we’ll see all the info about it pop up in the right sidebar:

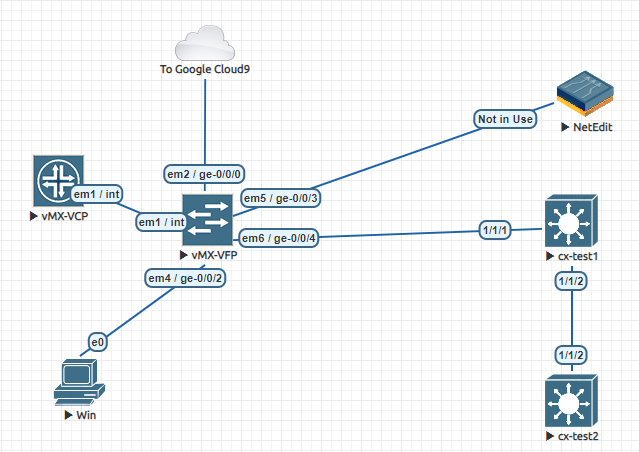
So at this point you’re probably thinking: well that’s cool, but wasn’t this supposed to discover the cx-test2 switch as well? After some googling, I came across an awesome reddit post where someone had a similar issue, and the fix was to add “lldp management-ipv4-address 10.137.4.52” to the running config. So after throwing that on cx-test2 and re-doing the device discovery (using same seed IP of cx-test1 for good measure), I was surprised to see absolutely nothing happen again, no sign of cx-test2 in the topology 🙁 This led me to believe the seed device (in our case cx-test1) needs to be LLDP neighbors with whatever else we’re adding to the network. To validate this, I made a quick topology change within eve-ng, daisy chaining cx-test2 off cx-test1:
Unfortunately, all that resulted with the daisy chaining was an L1 loop getting created somehow, which is very bad as AOS-CX doesn’t do spanning tree by default! So I ended up reverting the change to the initial topology, added both 10.137.4.51 & 10.137.4.52 as seed devices, and both switches made it into NetEdit successfully. Feels like I’m either hitting a bug, I have a config mistake, or the way eve-ng does the virtual network connections just isn’t going to fly. If you get full autodiscovery working between NetEdit and AOS-CX devices, please let me know how you did it in the comments!
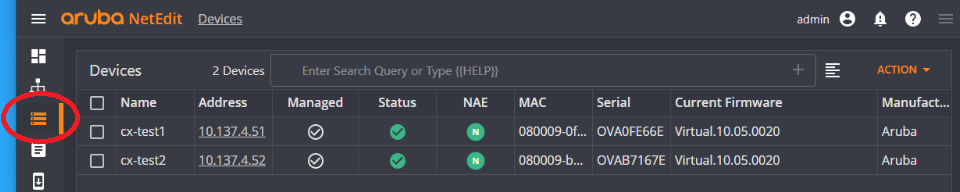
So after all of that discovery hassle, you can click on the Devices icon in the left side menu, and see both AOS-CX switches awaiting our commands:
Let’s select both switches, click the Action menu, then click Edit Config:

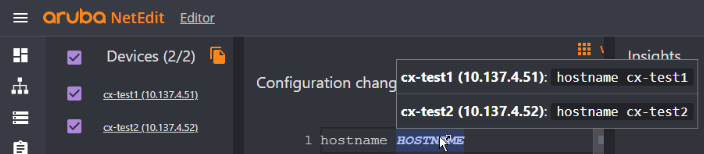
Put your mouse over the HOSTNAME highlighted section of the config at the top, NetEdit will show you how the command is different between the two switches! Pretty slick, huh?
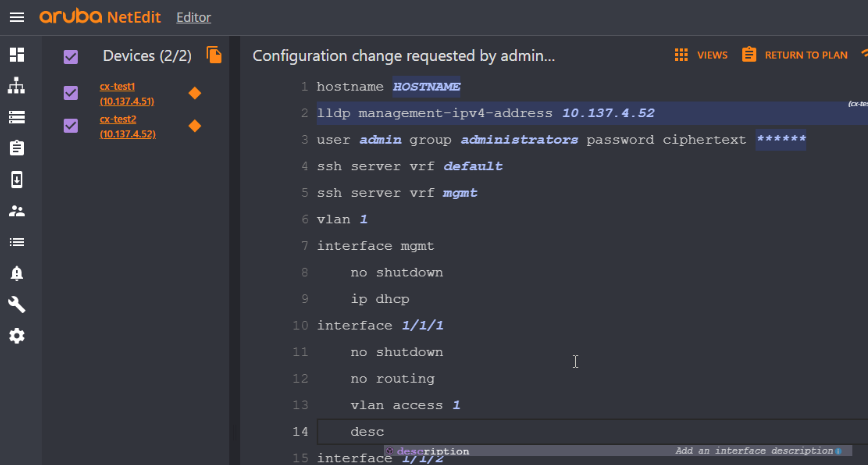
Remember how I added that “lldp management-ipv4-address 10.137.4.52” command on cx-test2 while troubleshooting autodiscovery earlier? Since that resulted in cx-test2 having this config line, but cx-test1 staying the same, we can mouseover line 2 of our combined switch config to see that it only exists on cx-test2:

Both switches have port 1/1/1 as their uplink to the Juniper switch, so let’s go ahead and add that description to interface 1/1/1. I’ll add it at the bottom of the config section for that interface, and I’m able to tab complete desc to description as I’m typing, just like I’m at the CLI!
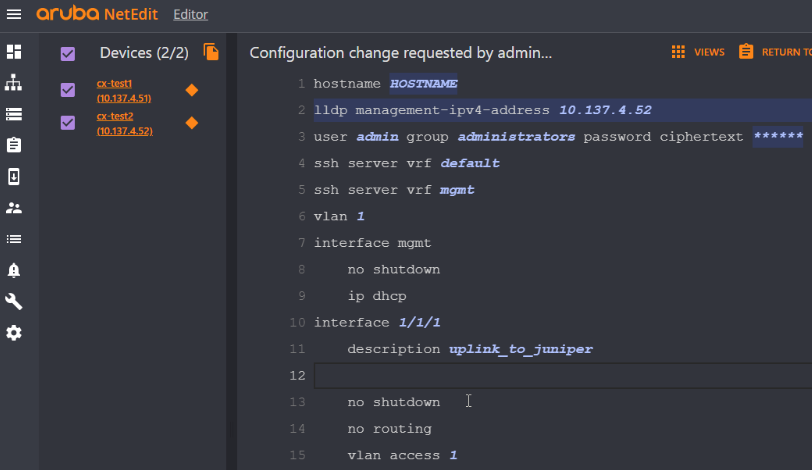
When I press enter to complete my line of configuration, NetEdit will automatically put that description where it belongs as the first command for the interface section:
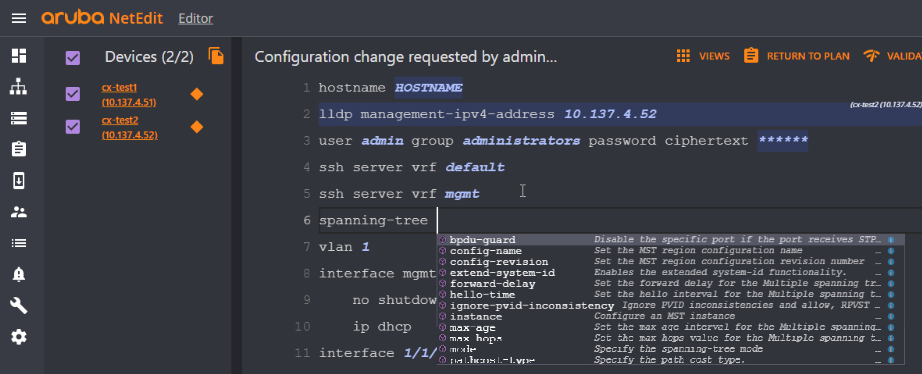
Now let’s say I want to enable RPVST for vlan 1 on both switches. I’ll just add the spanning-tree command underneath line 5, and as I begin typing, all the available options will appear underneath my cursor, kind of like I’m in an IDE specifically for AOS-CX:
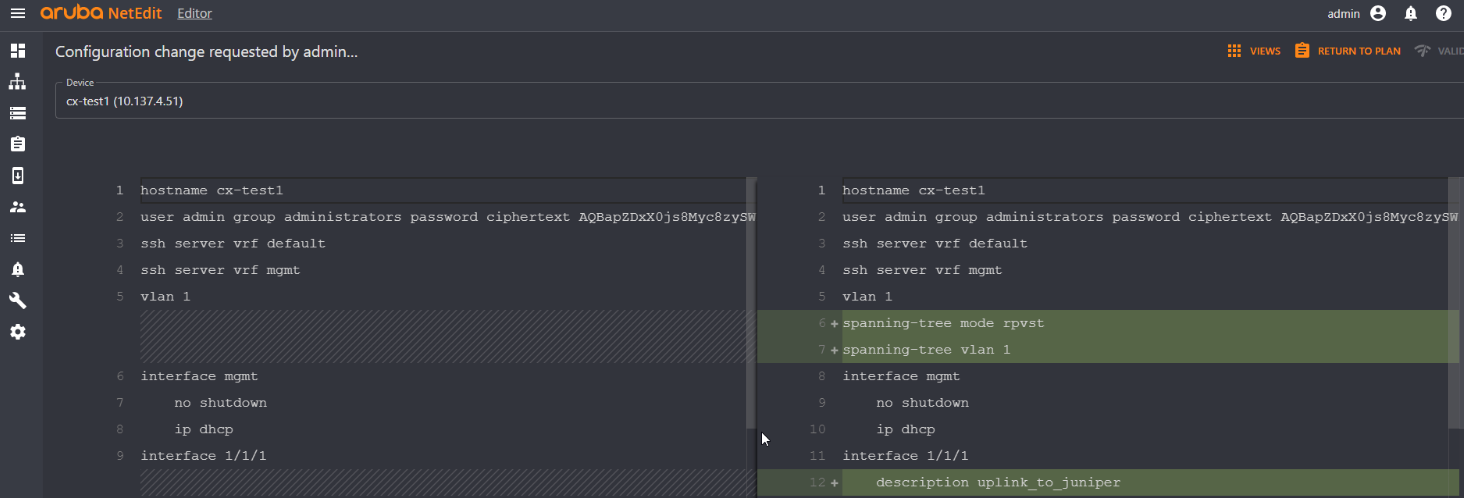
After adding “spanning-tree vlan 1” and “spanning-tree mode rpvst” to the config, I’m about ready to have NetEdit ship my config off to both AOS-CX switches. But before I do that, let’s click on the Views button near the top of the screen, and switch to Diff mode, where we can confirm the changes that will be applied to both switches:
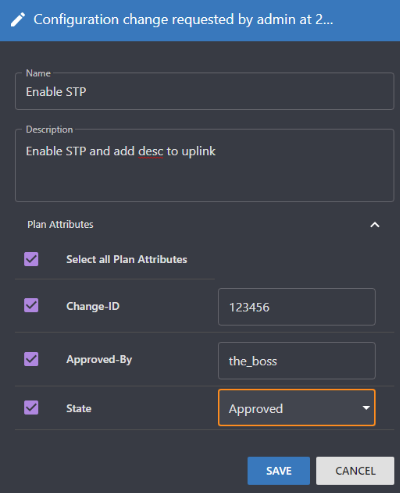
Click on the “Return to Plan” button, and then click the Action button to edit our change plan & attributes. For now I’m just throwing some random information in to demonstrate that you can log approvals, descriptions about what’s changing, etc. Obviously this is useless here in the homelab, but pretty cool to have a searchable log of all things that have changed when you’re working with other engineers:
Finally, click on that big purple Deploy button, and watch the edits get deployed to the switches! After the change goes out, note how you get some fancy new buttons on the plan details page:
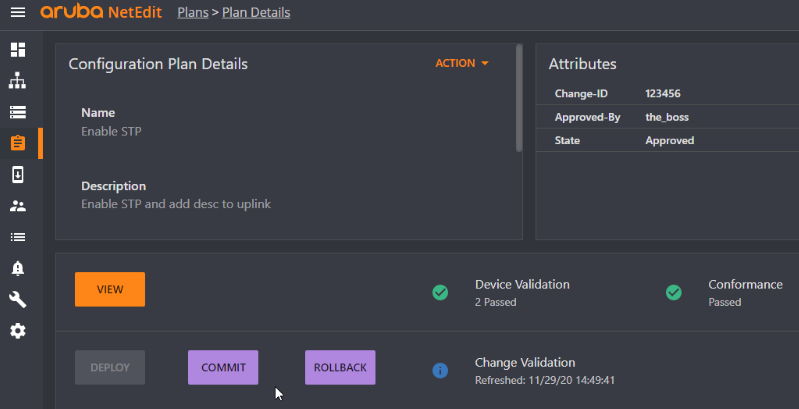
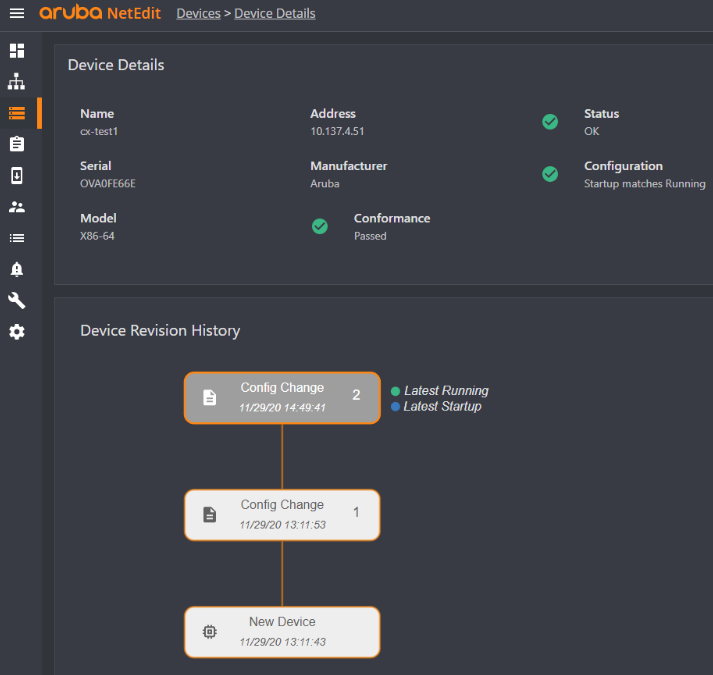
I can now click on the Change Validation button to see how things like our routing tables, LLDP neighbors, etc. have changed. The Commit button will do a “write mem” on the switches to save the configuration, and the rollback button has the power to undo anything deployed that broke stuff (assuming I didn’t break the network so badly that I can’t access the switch!). Finally, if we go back to the devices page and click on either of the switches, the config change history and a log of everything that’s happened will appear, helping all network engineers avoid configuration drift:
What’s Next with NetEdit?
This post is only scratching the surface of what’s possible with NetEdit. One of these days I’m hoping to do more with all the fancy new EVPN things that AOS-CX supports using NetEdit solutions, but I need to learn more about design for that stuff before homelabbing it. Soon the 10.06.0001 version of AOS-CX should come out in OVA form, when it does I’ll probably do another homelab showing how to mass upgrade AOS-CX switches using NetEdit, taking advantage of the change validation features. In the meantime, check out the Airheads Broadcasting Channel’s selection of NetEdit videos, many of them are for NetEdit 1.x, but from what I can tell, it feels like the general concept of everything is the same in NetEdit 2.x. Happy NetEditing!
You should also know I may earn commissions on qualifying Amazon purchases made via kd9cpb.com links to defray the cost of otherwise ad-free web hosting.
One thought on “Managing ArubaOS-CX with NetEdit 2.0 in eve-ng”
Comments are closed.