
As always, opinions in this post are solely those of my own, and not necessarily those of any organization I am currently affiliated with or have been in the past.
First posted 10/31/2020
In the initial setup, we got traffic passing via a sweet VTI tunnel from my condo’s homelab into a GCP eve-ng instance. This is good, but it would be great if we could get some internet access on the Windows 10 Admin workstation living within the GCP eve-ng instance. It’s possible to do some eve-ng NAT cloud stuff, or do the Daniel Herrmann Techblog NAT trick, but I’m just not a huge fan of anything involving NAT in the cloud.
Why not just use the perfectly good internet pipe at the condo for internet, and only need to deal with one simple NAT statement on the condo’s ASA? Well with the magic of Squid proxy built-in to NST32, that’s exactly what we’ll be doing! One of the reasons I like running NST32 on my ancient personal laptop (and within my eve-ng instances) is because tools like Squid are crazy easy to get working, and I get to stick with the RHEL style sysadmin tools I know & love.
Getting started with NST32
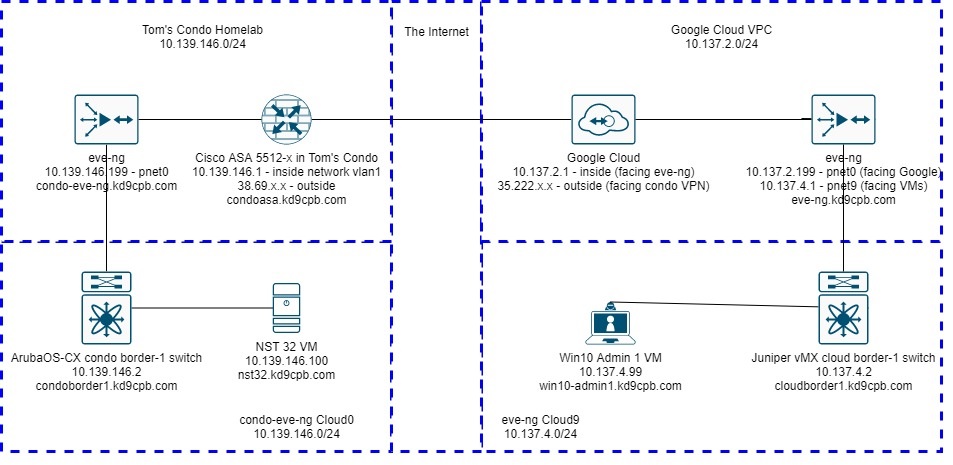
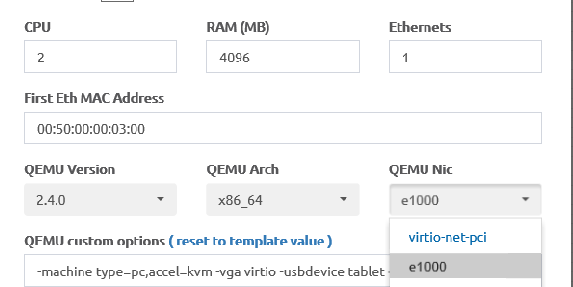
This lab is going to be almost entirely within the NST32 VM living in the condo’s eve-ng instance, and the Win10 Admin 1 VM living in the GCP eve-ng instance. We won’t be touching any of the Arista, Juniper, Cisco or GCP VPC configs today, quite a rarity for this network focused website! The one big thing you should keep in mind is NST32 doesn’t seem to play well with ArubaOS-CX and the default virtio-net-pci NIC used by default with eve-ng Linux images (as of this writing, at least). There’s more details on this at Airheads Community if you’re curious, and if you’re not using ArubaOS-CX at your version of my condo-eve-ng instance, you have nothing to worry about. But I blew a perfectly good Thursday night tshooting this, and I hope nobody else has burn a full night only to find out everything works with the Intel NIC driver!
Since there’s plenty of YouTubers out there with excellent how-tos on the basics, I’m not going to cover the initial install of NST32, Win10, disable ipv6, and setting the appropriate static IPs found in the diagram. Once you’ve got basic connectivity established on your VMs, meet me at the terminal of your NST32 workstation, and type in the following:
sudo -s
nstpasswd
This will set the password for nstuser, root, and a few other things within the inner workings of NST32. After this script runs, you should be presented with output similar to the following:
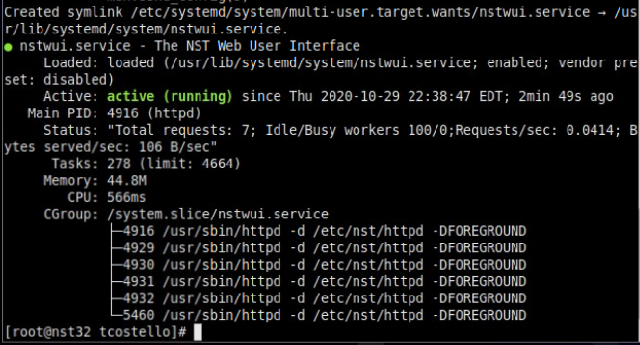
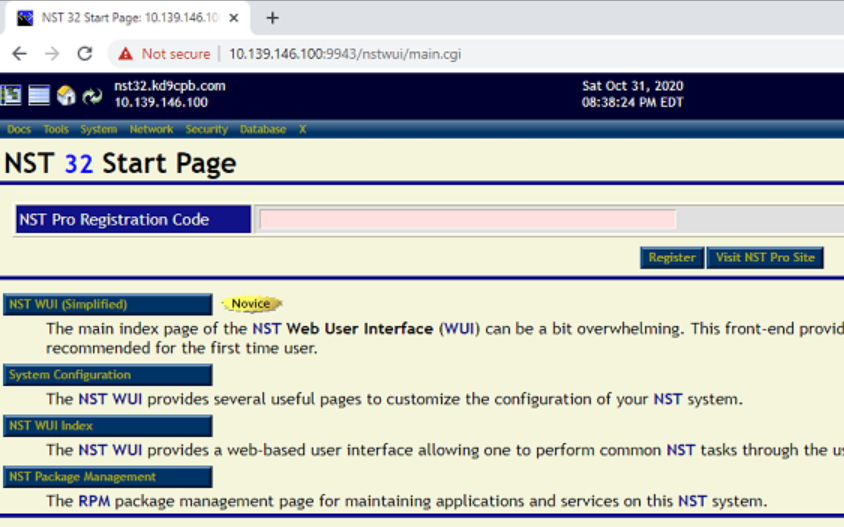
If you don’t see that beautiful Green active status for nstwui.service, go ahead and either reboot the VM or run “systemctl start nstwui” from the terminal. From the Applications menu in the upper left corner of NST32’s MATE desktop, select the Internet submenu, and NST Web Interface application. Login as root with the password you just defined, and you should be in the NST32 WebGUI!
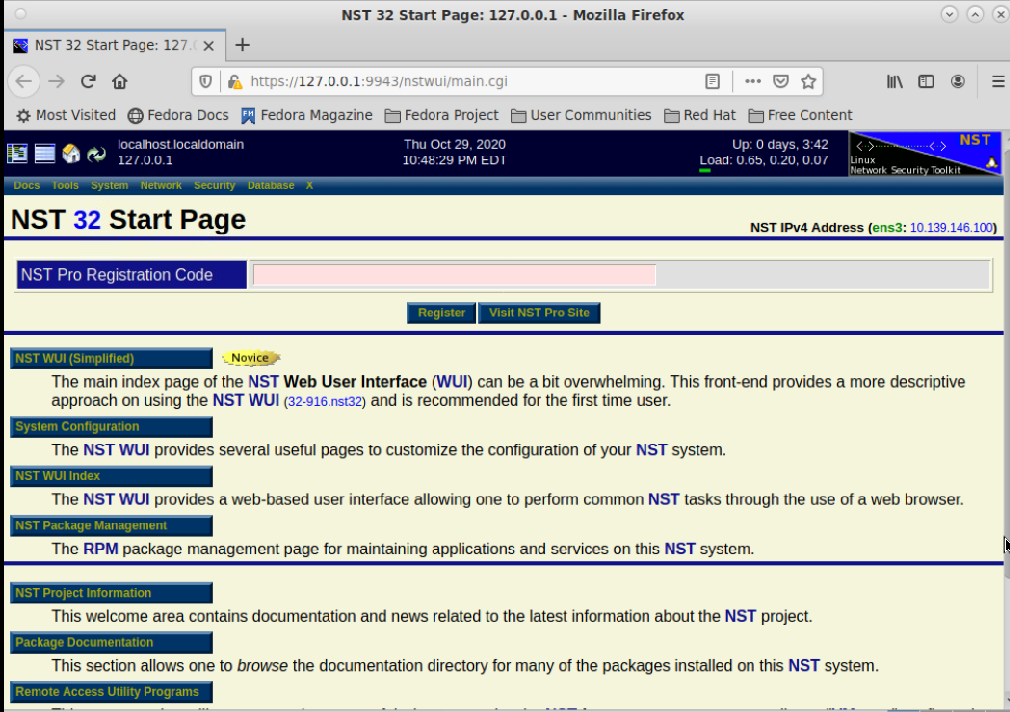
Once the WebGUI works on the local NST host, head over to https://(NST32 IP Address):9943 on the Windows workstation inside of the GCP eve-ng instance to ensure connectivity looks good:
If you’ve never checked out the NST32 Web UI before, I’d recommend mousing over the various menus and checking out some of the cool things at your fingertips. Using the method of your choosing (SSH, VNC via the eve-ng console, or even NST Web UI!), get a terminal session open on the NST32 host, and run the following commands as root:
systemctl enable squid
systemctl start squid
ps aux | grep squid
If all went well, you should see something similar to the following:

And that’s about it on the initial Squid configuration! One of the things I like about ps aux | grep (whatever application you’re running) is that you often find extra tidbits of information, such as any command line arguments or config file locations that otherwise might be a pain to find. In the case of Squid within NST32, we can see the config used is /etc/squid/squid.conf, and we can make whatever changes we want to that file to get Squid behaving however we’d like.
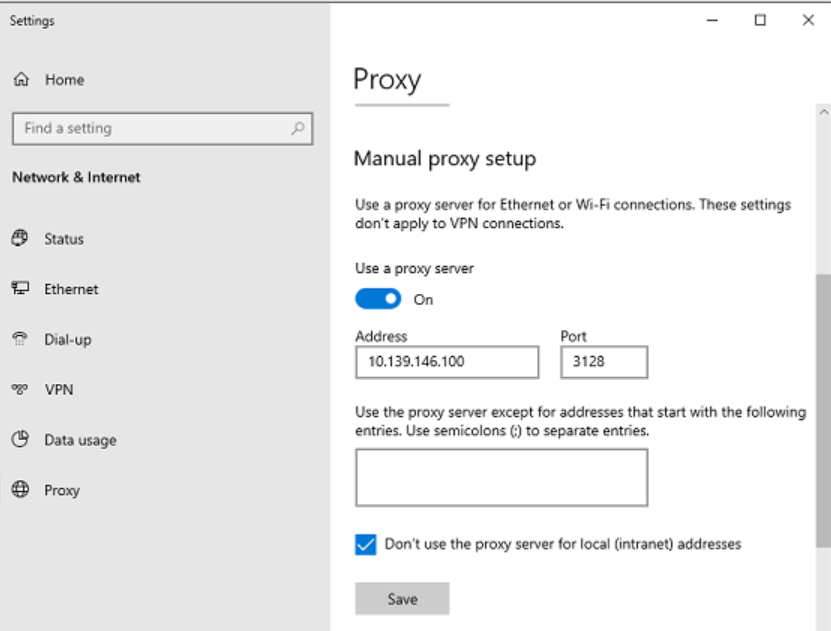
For now, I’m just going to use the default squid.conf in NST32, which I’ve also put up at this lab’s github folder if anyone’s curious. Now let’s head back to our Windows admin VM in the GCP instance, right click on the start button, select Network Connections, and click on the Proxy menu of left side of screen. Scroll down a little bit, and manually enter the NST32 IP address along with port 3128 (Squid’s default), checking the “Don’t use the proxy server for local connections” box too:
And that’s it! Let’s validate the proxy actually is working by going to my favorite website for validating internet connectivity: isdmxinjail.com

So now we know HTTP web browsing works, and we’ve confirmed (as of this writing) DMX is a free man! But before you start blasting “Party Up (Up In Here)” as loud as your computer allows to celebrate a successful internet connection from a VM in your GCP eve-ng instance, try an HTTPS webpage too, as isdmxisinjail.com is HTTP only for now.
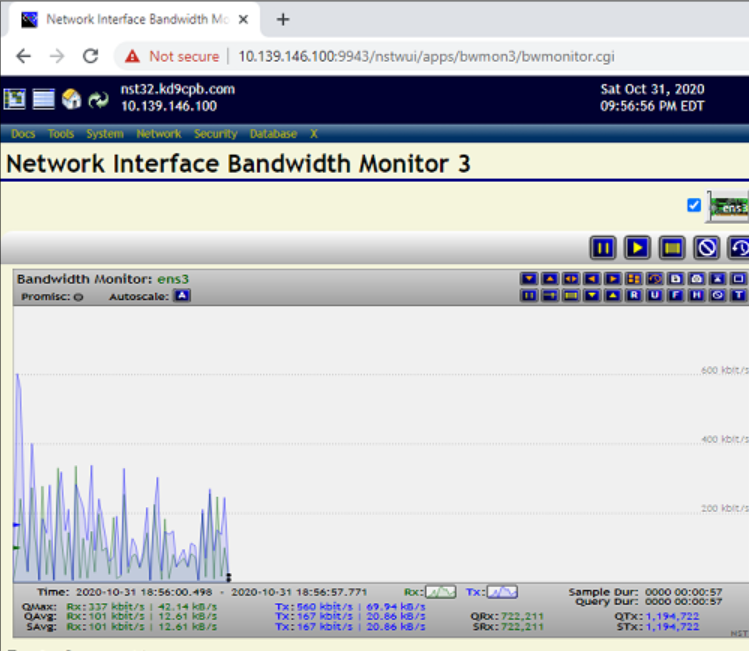
Please keep in mind if you knowingly or unknowingly open your Squid proxy server out to the entire internet, you’re probably going to be in for a bad day. So be smart about editing your Squid configuration file, and monitor traffic on your NST32 VM to ensure nothing crazy is going on. This is why we opened up the NST WebUI; lots of great tools to see the traffic, and if you do anything particularly cool with looking at Squid data within NST WebUI, let me know in the comments!
2 thoughts on “Squid Proxy for GCP eve-ng VMs”
Comments are closed.